This is my way, it isn't perfect but it works for me.
Your frames order will probably be packed in a large, heavy, box containing separate bundles of each part - top bars, side bars and bottom bars. If you aren't going to use them straight away you should store them flat, otherwise they can twist or warp with changes in temperature and
atmospheric moisture, especially if they are 'second' quality.
You need somewhere to put the finished frames - either an empty brood box or super, a hanging rail made from a long piece of dowel, or a specially made rack. If you stack them flat on a shelf in a wooden shed they may warp.
Why Hoffman frames?
 |
| Hoffman frame spacers |
What you need:
Bee farmers and commercial honey producers make hundreds of frames each season, and use a frame jig along with a nail or staple gun. A hobby beekeeper with a few hives will only need to make up batches of brood frames every three or four years once the number of hives has stabilised, but will need to re-wax or replace honey frames every year if they've been used for cut comb. Making frames is quite relaxing, sort of.
You will need a flat surface on which to make your frames. If you use folding work bench (mine is a Wolfcraft) prepare by putting a couple of 'stoppers' to your left, another to the right - making sure there's a wide enough space between them for a frame to lie flat. This will stop you having to chase, catch or restrain, the frame every time you use the hammer. If you're using a table you could clamp a piece of wood to your left which will help keep the frame still. (I'm right-handed. If you're left handed you will need to put stoppers to your right, and work with the top bar furthest away from you, otherwise you'll find it really hard to tack the V-shaped part of the side bar.)
When you start putting the frames together you will need a routine, otherwise you'll waste ages just turning round and picking up bits of wood. I take ten top bars, 20 bottom bars and 20 side bars and put them close to the work bench. The longest parts stand vertically in a pair of boots, the shorter pieces are on top of my tool box.
These frames are unwired, you'll understand why later.
You will also need:
- A small-headed hammer - I use one with a square head, rather than a lighter tack hammer because if I do need to persuade the bits to go together it's less likely to mis-hit and break off something important.
- Frame nails (often sold as Gimp Pins). I store these in a plastic tub, and tip only a few into the lid so that if I do knock the container over I'm not losing dozens of the things.
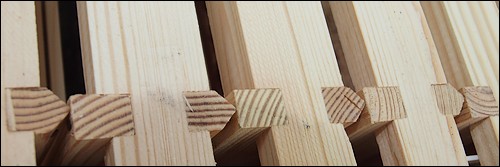
- Each frame comprises a top bar, 2x side bars and 2x bottom bars - 5 pieces of wood, which quickly becomes 6 when you remove the loose 'wedge'.
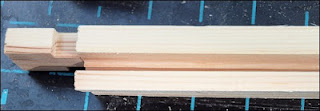
Loose frame 'wedge'


 |
| Frame wedge removed |
- Remove the 'wedge' from the top bar, it should be quite loose. Some beekeepers very carefully remove any remaining tiny slivers of wood too, in case the wedge doesn't sit flat when it's re-attached. I'm less particular, and leave any trimming until I attach the wedge. Put the wedge to one side and store it flat - you won't need it again until you wax the frame.
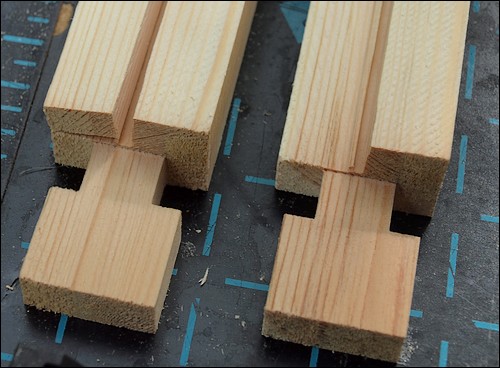
- Keep the upper surface of the topbar flat onto your work surface and push both side bars into place. Make sure the V-shaped side on the right-hand end of the top bar is facing towards you. The one on the left side should be facing away from you - it'll soon become second nature.
- Push both bottom bars into place. They are rectangular section, the narrowest edge goes into the gap.
- You are now ready to hammer the tacks into place. There's no need to use glue on any of the joints, it makes disassembling frames very difficult and bees have their own glue - it's called propolis.


- The pins holding the bottom bars go in vertically, upwards into the end grain of the side bars - this makes them easier to remove if you want to clean and/or re-wax the frames. Don't try to hammer them upwards though - you should have the top bar flat on the bench and hammer downwards.
- If you use pre-wired foundation you may prefer to nail only one bottom bar now, leaving the other until you insert the wax. (I'm not showing you how to do that.)
 |
| Complete, unwaxed, Dadant shallow Hoffman Frame |
Problems?
I've bought frames from two suppliers - Maisemore Apiaries and Thornes. The side bars and top bars are not cross-compatible, nor are the wedges. The bottom bars will fit either make of frame.

'Seconds' frames are usually about half the price of 'first' quality and, although some are rather knotty or badly cut, they do the job just fine. Minor faults could be as trivial as this slightly chewed bottom bar which doesn't look pretty, but is held in place by a tack so should do its' job.

(A later post will discuss wax foundation)
~'.'~
No comments:
Post a Comment